
Deploying Kitto with resin.io
This is a guide to deploy a Kitto dashboard application on a Raspberry Pi using resin.io.
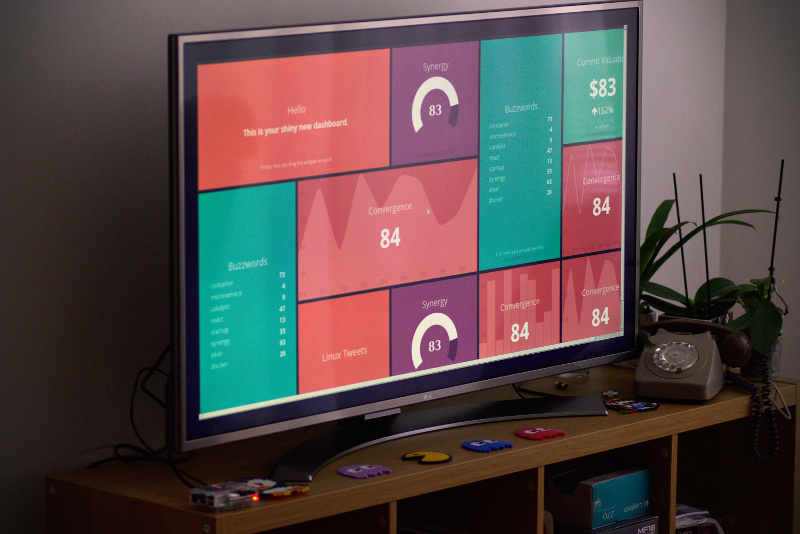
After you follow the steps below, you are expected to have a dashboard running on a raspberry connected to a TV which displays the dashboard full-screen using firefox.
Expected end result

Kitto is an open-source framework for dashboards, written in Elixir. It is focused on requiring minimal maintenance and system resources. It can be developed using the widespread grid layout of Dashing and features jobs like the following:
use Kitto.Job.DSL

job :random, every: :second do
  broadcast! :random, %{value: :rand.uniform * 100 |> Float.round}
end
![]()
resin.io is Heroku for IoT devices.
You flash their OS for you device (preferably using Etcher), create a Dockerfile for your application and finally run perform the actual deployment using:
git push resin master
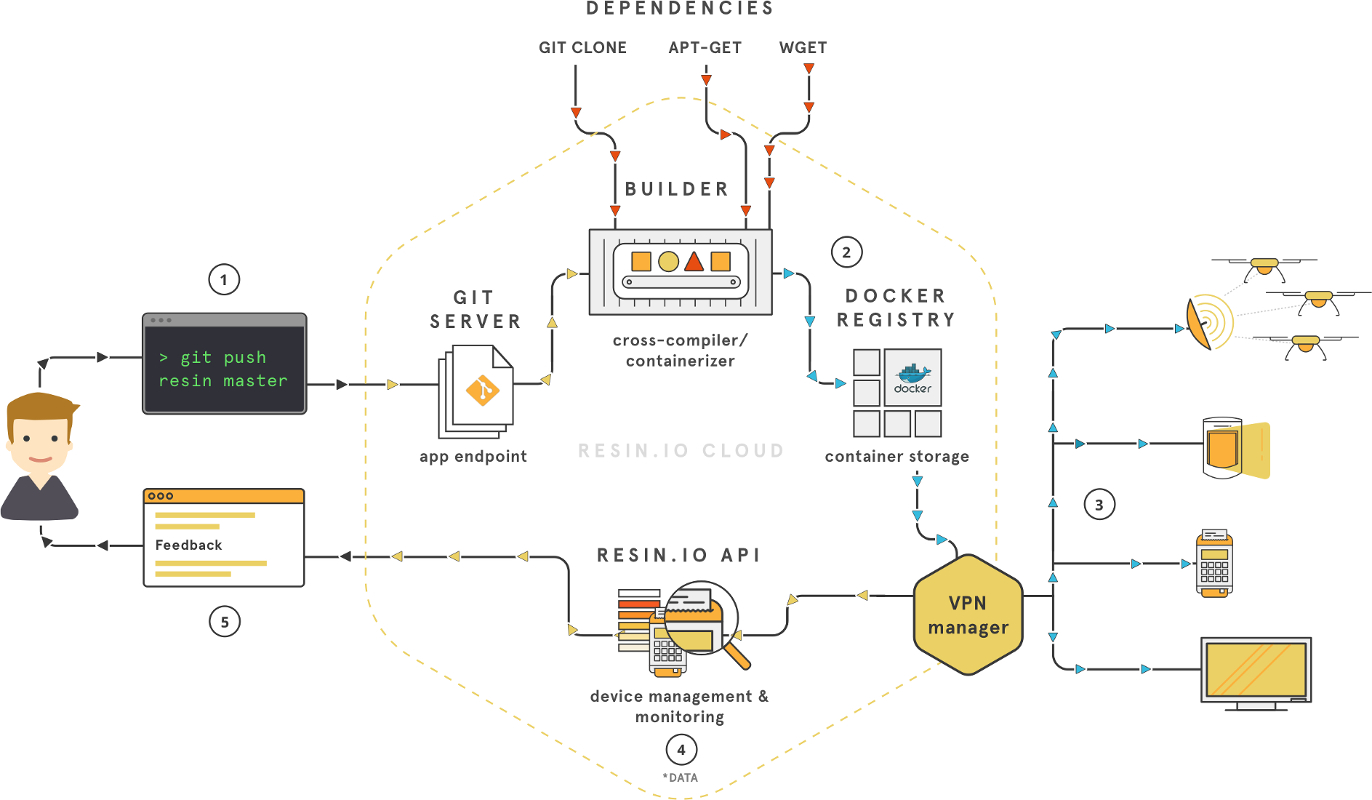
Under the Hood
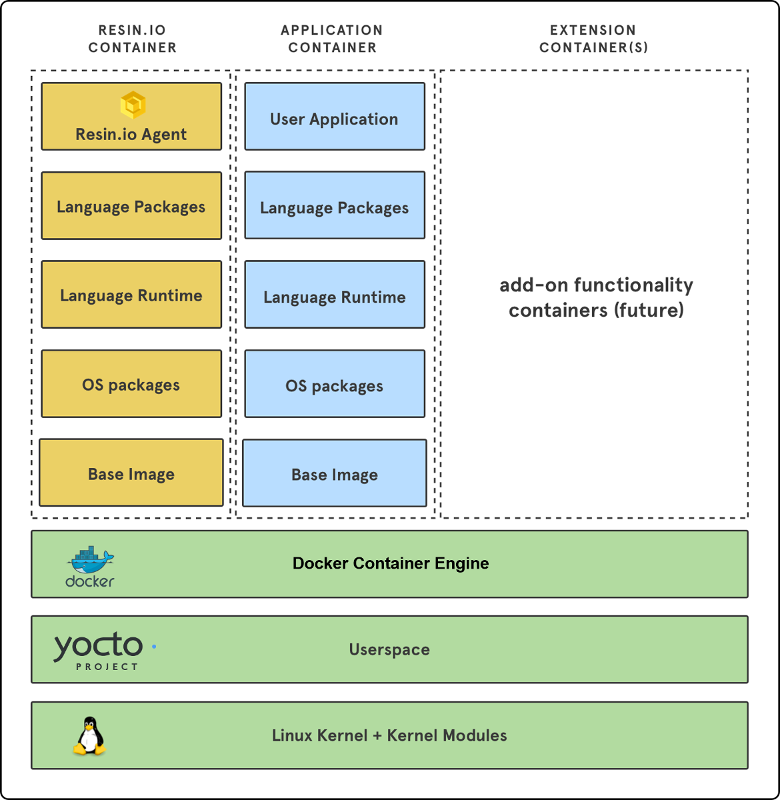
Your device will run the resin OS which is based on the Yocto Project. The OS runs Docker, where a container for your application will live together will the resin agent, which will take care of application and system updates.
Linux all the way down :-)
Getting Started
What you’ll need
- 1 × Raspberry Pi
- 1 × External monitor / TV
- 1 × HDMI cable
Install Elixir
You can follow the official instructions at http://elixir-lang.org/install.html or you can use the official Kitto Docker image for local development.
Get the Installer
Run the following command:
mix archive.install https://github.com/kittoframework/archives/raw/master/kitto_new-0.6.0.ez
Note: Replace 0.6.0 with the latest version found at: https://hex.pm/packages/kitto
Generate a Dashboard
You can now use the installer to generate a dashboard using:
mix kitto.new dashboard
This will create a directory structure containing a sample dashboard.
The core conventions of Kitto are:
You define dashboards in templates located under ./dashboards.
Each dashboard is available at a its own path. For example
./dashboards/jobs.html.eex will be served from http://localhost:4000/dashboards/jobs
You define jobs in Elixir files located under ./jobs. Jobs are responsible for fetching and processing data, commonly from external sources.
Finally you define widgets (or use any of the already available ones) using React components.
Start your Dashboard Locally
Assuming you have nodejs installed on your system you’ll only need to run:
Install dependencies:
mix deps.get && npm install
Start it:
mix kitto.server
Assuming you haven’t changed the default configuration you should be able to try your dashboard locally at: http://localhost:4000
Extending and Customising your Dashboard
You might enjoy reading the following blog posts for developing dashboards with Kitto:
Extended documentation for Kitto can be found in the wiki and its hexdocs.
Deployment
Create a Resin Account
Head to https://resin.io/ click “Sign Up” and create an account.
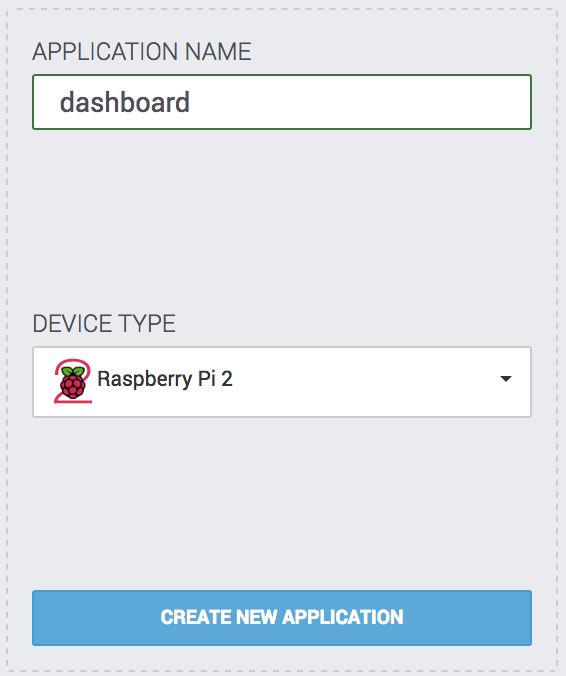
Create a Resin Application
Click on the “APPLICATIONS” link on the top-left corner and fill in the required info as seen below:
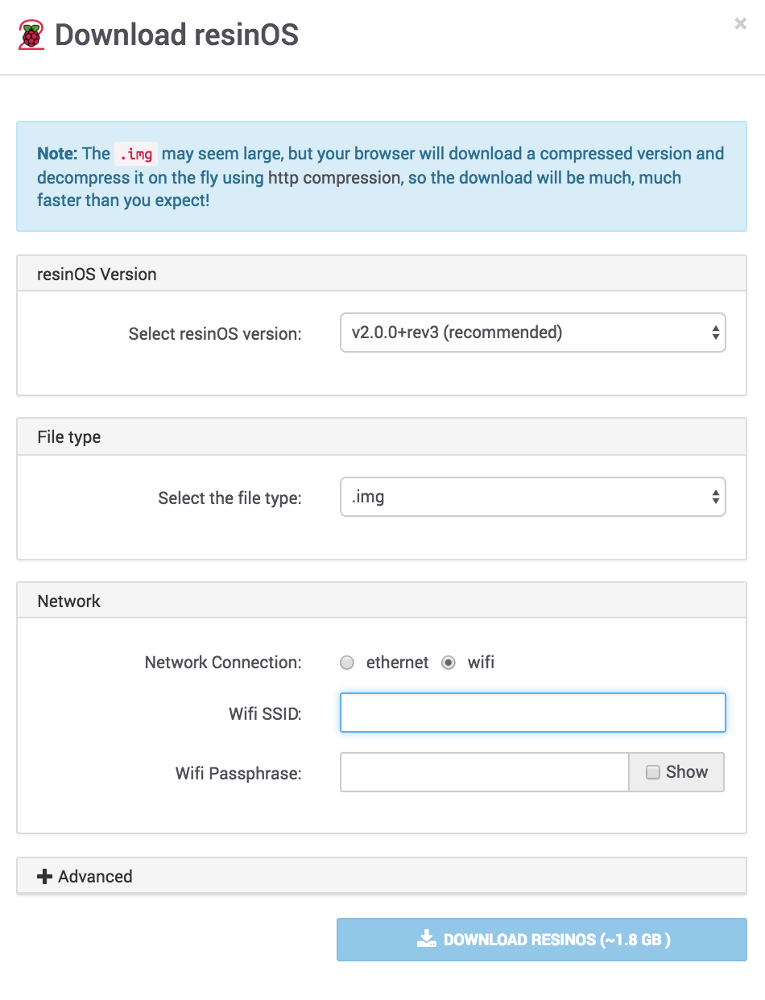
Follow the instructions found here to download the Resin OS for your device.
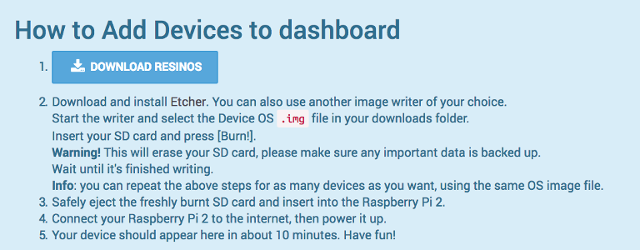
It’s important to provide correct information concerning your Wifi SSID / Passphrase for the device to be connect automatically to your network.
Boot your Device
Having inserted the sd card with the Resin OS in your Raspberry, connect it to the TV using the HDMI cable and plug it to power.
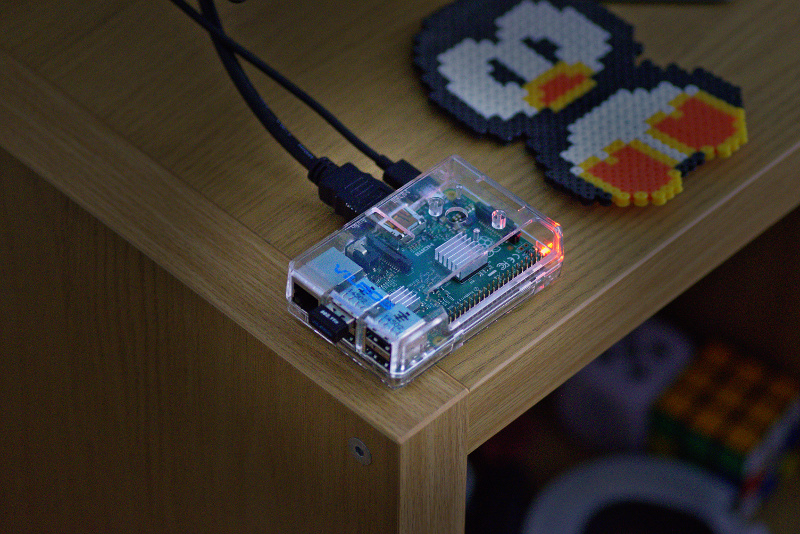
It's alive!
Create a Resin Dockerfile
When you generate a dashboard via the installer a Dockerfile is created for you, but you need a different one for resin.
At a glance the differences are that it’s based on zorbash/kitto-kiosk,
instead of zorbash/kitto and has a different entrypoint.
kitto-kiosk (source) comes
with the iceweasel browser installed, modified to start in kiosk mode
(full-screen, disabled menus and toolbars). It also has all common npm
dependencies pre-installed in /dashboard/node_modules to speed up npm install.
Copy the following to a file named entrypoint.sh
#!/bin/bash

elixir --detached --sname kitto@localhost -S mix kitto.server
/bin/kiosk
and use the following Dockerfile:
FROM zorbash/kitto-kiosk:latest

ENV MIX_ENV prod

RUN install -d /dashboard

WORKDIR /dashboard

ADD ./mix.exs ./
ADD ./mix.lock ./

RUN mix deps.get
ADD . /dashboard
ADD ./package.json ./

RUN npm install --silent
RUN npm run build

RUN mix compile

ADD ./entrypoint.sh /bin/entrypoint.sh

CMD ["/bin/entrypoint.sh"]
Make sure you use the following config/prod.exs for your dashboard app:
use Mix.Config

config :kitto, reload_code?: false, watch_assets?: false, serve_assets?: true, ip: {0,0,0,0}
Deploy
Time to make the actual deployment happen!
Find the git remote for your application at the top right corner of your
resin application page.
You have to initialize a git repository for your dashboard locally first.
Inside your the root directory of your dashboard run:
git init
Copy the command in the image above and finally push.
git push resin master
You can also try
git push master:master-armto use the native arm builders of resin (see: https://forums.resin.io/t/native-arm-builders-beta/171)

After that, resin will pull the image to your device and start a container off it. In a few minutes you should see the dashboard running on your TV screen.
Notable Resin Features
Changing ENV vars
When you change an env variable in resin the app is automatically restarted and your changes are reflected immediately.
For example you can change the DASHBOARD_URL variable to point to
another dashboard.
Try http://localhost:4000/jobs which is a dashboard which comes with Kitto and displays
internal information about jobs and system resources.
Public URLs
Resin allows exposing port 80 of your application in a public url of the
format <RESIN_DEVICE_UUID>.resindevice.io. Read more about it here.
To have the Kitto server start at port 80 you’ll have to change your config/prod.exs like below:
use Mix.Config

config :kitto, port: 80
Resin CLI
Resin comes with a cli application to help you manage your devices and apps. Have a look: https://docs.resin.io/tools/cli/
Future Work
- Prevent iceweasel checks for updates or use chromium
- Configure screen resolution (
xrandr) via env variables